Lesson 4 – Style Components & Schematics
Knitware
Style Components & Schematics
Lesson 4
This lesson continues to move through the Pattern Data screens for Style Components and we start to look at Schematics as well. The information you enter or change in Style Components will impact your entire pattern, as well as the fit and style of your item.
If you open your Knitware Software program, Click üOK twice, then click on Pattern Design. Complete the Pattern Name, Size Data and For Whom Sections we learned about in Lesson 2. Then continue on, enter Yarn Information, select Working Method(s), discussed in Lesson 3 . Using the Stocking Stitch Swatch Completed for Homework, complete the Test Swatch Gauge section.
Garment Styles - A Difference
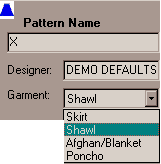
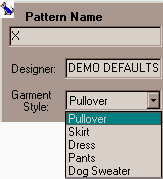
If you have been following along using Basics 2.5 or Skirts & Shawls 2.5, you know we have been ignoring the Garment Style selection that appears in the Pattern Name area. Shown here you can see that there are several different Garment Styles can be selected from the drop down lists.
Sweaters 2.5 has 2 Sweater Body Styles to choose from in the Style Components area. You can select Pullover or Cardigan. This does not limit the abilities of Sweaters 2.50. Two sweater body styles is multiplied by the number of garment options
So Many Options
Knitware Programs have most garment options covered. The lists are long and while we could address each one in these lessons, that would take quite a while. You must become an explorer. Experiment with each garment and option available. You selected a Knitware program that helps you pattern your favorite items in Lesson 1. You know a little bit about how your favorites are constructed. Use the changes in your schematics or warning messages as a guide to understanding what each option changes. All Garment and Style Component Options are scrolling for each program below.
Knitware Sweaters 2.50
Construction Method: Flat (Bottom-Up) Circular Bottom-Up Circular Top-Down Body Style: Pullover Cardigan Body Shape: Straight Fitted Waist A-line Shoulder Style: Drop (T-square) Modified Drop Raglan Set-in (fitted), with Classic, Gathered or Pleated Cap Saddle Round Yoke Body length: Crop (just below the bust) Waist Regular (between waist and hips) Hip Thigh Above Knee Knee Calf Ankle Body or Sleeve Hem: Ribbing Moss stitch band Garter stitch band Frill (ruffle) Folded band Crochet edge No hem Neckline (front or back): Round (crew) High Round V Scoop Ballet Square Boat (butted or overlapped) Keyhole (front only) Flat Shallow Backless (back only) Collar: Single band Double band Shirt (Split) Rolled edge Funnel Cowl Turtleneck Shawl Hood (simple or shaped) None Crochet Edge Cardigan/Keyhole Button Bands: Vertical Rib Horizontal Rib Picot (folded band) Moss Stitch Garter Stitch None Sleeve length: Full Three-quarter Half Short Cap Sleeveless (inset) Sleeve Style: Narrow Taper Moderate Taper Lantern / Straight Modified Lantern Bishop Bell Dolman
Knitware Skirts & Shawls 2.50
Garment Style: Skirt Shawl Poncho Afghan Skirt Style: Straight A-line Flared Swing (Godet) Skirt Length: Mini Above Knee Knee Calf (Midi) Ankle Floor Skirt Waistband: Ribbing Elastic Casing Drawstring Herringbone Crochet None Skirt Hem: Ribbing Moss stitch band Garter stitch band Frill (ruffle) Folded band Crochet edge No hem Skirt Construction: Top Down Bottom Up Sideways Skirt Waist-to-Hip Shaping: Gathered Shaped at Sides Tiered (Shaped across Rows) Shawl/Afghan Shape: Circle Half circle Rectangle Square Shetland Triangle Faroese Shawl Size: Small Medium Large Afghan Size: Queen Bed Double Bed Single Bed Throw Lap Crib Baby Dish Towel Pot Holder Shawl/Afghan Border: Marathon Sprint Fringe Crochet None Shawl/Afghan Construction: Top Down Bottom Up Sideways Diagonal Center Out: Wedges Center Out: Rings Poncho Construction: Two Rectangles Four Triangles Closed Circle: Sideways Open Circle: Sideways Closed Circle: Top-Down Open Circle: Top-Down Poncho Size: Chest Waist Hip Thigh Knee Calf Ankle
Knitware Basics 2.50
People Dolls & Stuffed Animals: Pullovers : Round neck drop shoulder ribbed hem pullover Pullover length options: waist regular hip or coat Sleeve length options: long sleeve cap sleeve or sleeveless Skirts: Worked in 2 pcs only front and back the same Ribbing at waist with garter stitch hem Skirt style options: straight flared ruffled Skirt length options: mini knee ankle. Dresses: Worked from waist to neck for the top waist to hem for skirt. Lace holes at waist Combination of skirt and pullover styles. Pants: Worked in two side pieces sewn together at center front/back. Ribbing at waist with garter stitch or folded hem Pant leg style options: legging slim straight flare wide flare Pant length options: pantie shorts knee Capri ankle Optional suspenders. Live Animal Sweaters: Styles: simple pullover tuxedo Sleeve length options: short medium long. Front length options: short medium long. Collar options: single band ribbing double band ribbing rolled edge.
About Style Components
The Style Components section for each of program is different. Style Components are based on the garment and the styles and components available for each Garment Type. When using Basics or Skirts and Shawls, you will have selected a Garment in the pattern name area.. The Style Components section will be altered based on the Garment you select. You can then Use the drop down menu to review and change each component of your item. Ease Style is common to all Knitware programs and most garments.
On Ease
You have five Ease Style options to choose from. When we create, or purchase a garment it is expected to fit in a certain manner. The Ease Style component found here refers to that type of fit. Additionally, certain garments* should be knit using particular ease style based on their use. The best Ease Style selection for Tank Tops or Camisoles is Skin Tight. This type of garment is worn closer to and exposes more skin than most garments. Were it knitted at a looser Ease Style overexposure would be a problem. However, a similarly styled dress, or duster style cardigan by selecting a length to ankle or knee Skin Tight as my Ease Style wouldn't make sense. I need to consider the amount of room needed for the clothing worn under the dress or duster. We must consider the use of the garment as we make these selections. Certainly you want a specific type of look, understanding why certain styles should be done certain ways is valuable. When in doubt do some research and include garment type and use in your pattern design process. Designers and seasoned fiber crafters alike repeat the fact that well fitted garments are flattering to any body shape or style.
Ease Style and Ease Factor found in size data information should not be confused with each other. We will look at Ease Factor when we discuss custom sizing in a future lesson.
* Ease Style options are not offered for Ponchos, Shawls, Afghans or Blankets.
Changing Style Components
The demo versions each open up to a basic or default pattern named "X". From here you want to create a vest pattern, but there is no vest option. A vest is a sleeveless sweater either in pullover or Cardigan style. Seems pretty simple to many of us, but its not right there on the menu. We did say that Knitware would challenge you right? Here are some common Style Component Combinations for you to try out and review the resulting garments information. Some Style components (hems) are not selected, as you follow along select these based on your style. Watch the Schematic windows on the right change as you make your changes. To change a component use the drop down menu as you have been doing for other selections in your Knitware program. Some lists are quite extensive so take time to review each one and become familiar with them as you follow along.
| Style Component | Ease Style | Body Style | Body Shape | Body Length | Shoulder Style | Sleeve Length | Neckline* | 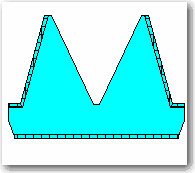 |
| Selection | Skin Tight | Pullover | Fitted Waist | Crop | Raglan | Sleeveless | V |
*Front and back Necklines can be the same or not, you decide.
| Style Component | Garment Style | Shape | Size | Border | Construction | 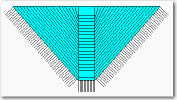 |
| Selection | Shawl | Faroese | Medium | Fringe | Top Down |
*Remember that ease is not an option for Ponchos Shawls or Afghans
| Style Component | Garment Style | Ease Style | Pant Style | Pant Length |  |
| Selection | Pants | Comfortable | Wide Flare | Knee |
Garment Terms and Style Component Selections
There may be selections and terms used for Style Components and Style Component options that you have not heard or seen before. It may be that a term is different in your part of the world. Use the glossary available on Knitters Edge or the Knitware Help Files for clearing up these areas.
TIME OUT FOR TOOL USE! Using the Help Files in Knitware Programs. From the Main Knitware Menu click on Help, then click on Contents.
The Help Topics: Knitware "**Program Name" window opens.
You can use the Contents section to find specific topics of interest, simply click on a topic and its sub topics will appear. For learning, reading section by section is great. It takes some time to get through it all. It is worth it to put in the effort.
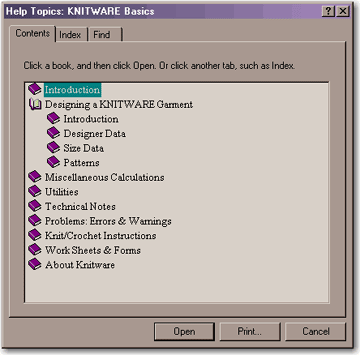
**Shown here with Basics Program in use
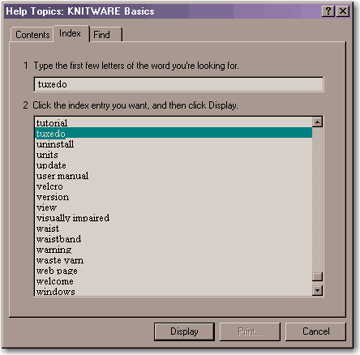
Also if you prefer you can click on Index which is the method commonly used for quick answers. You can look for specific words in order to get a better understanding of their use and definition.
Knitware help files contain more than just dry program information. The help files also include how to instructions, measuring worksheets and diagrams along with valuable tips and tricks. Try it out!
Schematics
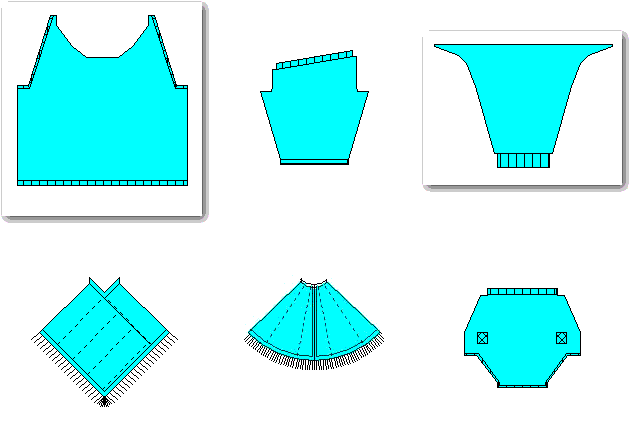
Throughout this lesson I have referred to the schematic windows that are on the right side of your Knitware program screen. Now we will discuss how you can use schematics in general. As mentioned the schematics change based on your Garment style and Style Component Selections. Schematics appear throughout this lessons to graphically represent the Garments. This is exactly what the schematics are for. If you were to be working on a garment which is created by 2 or more identical pieces you will see 1 schematic on the right side. (Ex: Faroese Shawl or Flared Short examples shown above). Most garments are made up of several different parts. For each unique part a schematic is created. So if you are looking at a pullover or cardigan there might be 3 - 4 or more different schematics on the right.
Lets look at one Schematic Window and learn about how we can use it.

jj This is the Window Description, look carefully here as you may be looking at the back of your garment as opposed to your front. Its easier to tell when you are looking at a sleeve as opposed to a front or back.
k These are the ![]() Minimize,
Minimize, ![]() Restore and
Restore and ![]() Close Window buttons that are used throughout computer programs. These are important in using Knitware Schematics. More on this below.
Close Window buttons that are used throughout computer programs. These are important in using Knitware Schematics. More on this below.
ll Save Menu/Button (these will be unavailable in Demo Versions) Takes you to the Schematic Save Option Menu which also allows you to copy the schematic to the clipboard as well.
m Print Menu/Button takes you to the Print Schematic Options menu. You can print Schematics separately or together.
n Schematic Graphic. A graphic representation of your pattern.
Restore Button the window will expand and in addition to all the other areas you will then see the description of your pattern piece, the designer name, file name, size and the date. Even More importantly the schematic window now includes the measurements and the row and stitch information for each part of the schematic. This is useful when working with Finished Dimensions as we will be doing in our next lesson.
Homework!
I have noticed that people don't select unfamiliar style components. Challenge yourself and your fiber crafting abilities. Specifically select unfamiliar style components. You don't have to use them just learn more about them. If you don't know a definition search for it here on Knitters Edge or use the help files included with Knitware.
Look at how the schematics change as you make different selections. Look at them individually and together.
Imagine how such an item would look knitted up and sewn together.
Create 3 or 4 different garments make sure to use components that you aren't super knowledgeable on. Become comfortable with how the screens work together.
For a bit of fun... click print on a schematic. When the Print Schematic Options opens Select "All Schematics Together on one Sheet. Select Colour the pieces (or not) then click the üContinue button. Then change the selections so that none of the dimensions or grid lines print out click üOK and print the document (Print the document twice for two sleeves). Cut the printed out schematics out carefully for a paper doll garment or create a hem edge and a little tape for a not to scale representation of your pattern! Add some fabric scraps and you have great emergency fun for bored children or adults who remember playing with paper dolls.
Our Next Lesson will discuss Finished Dimensions and Patterns!

Leave a Reply
You must be logged in to post a comment.